| PFTrack Documentation | Workspace |
Workspace
Toolbar | Upper workspace | Lower workspaceThe PFTrack workspace comprises of several windows and tool areas, and forms the main space where tracking operations are carried out.
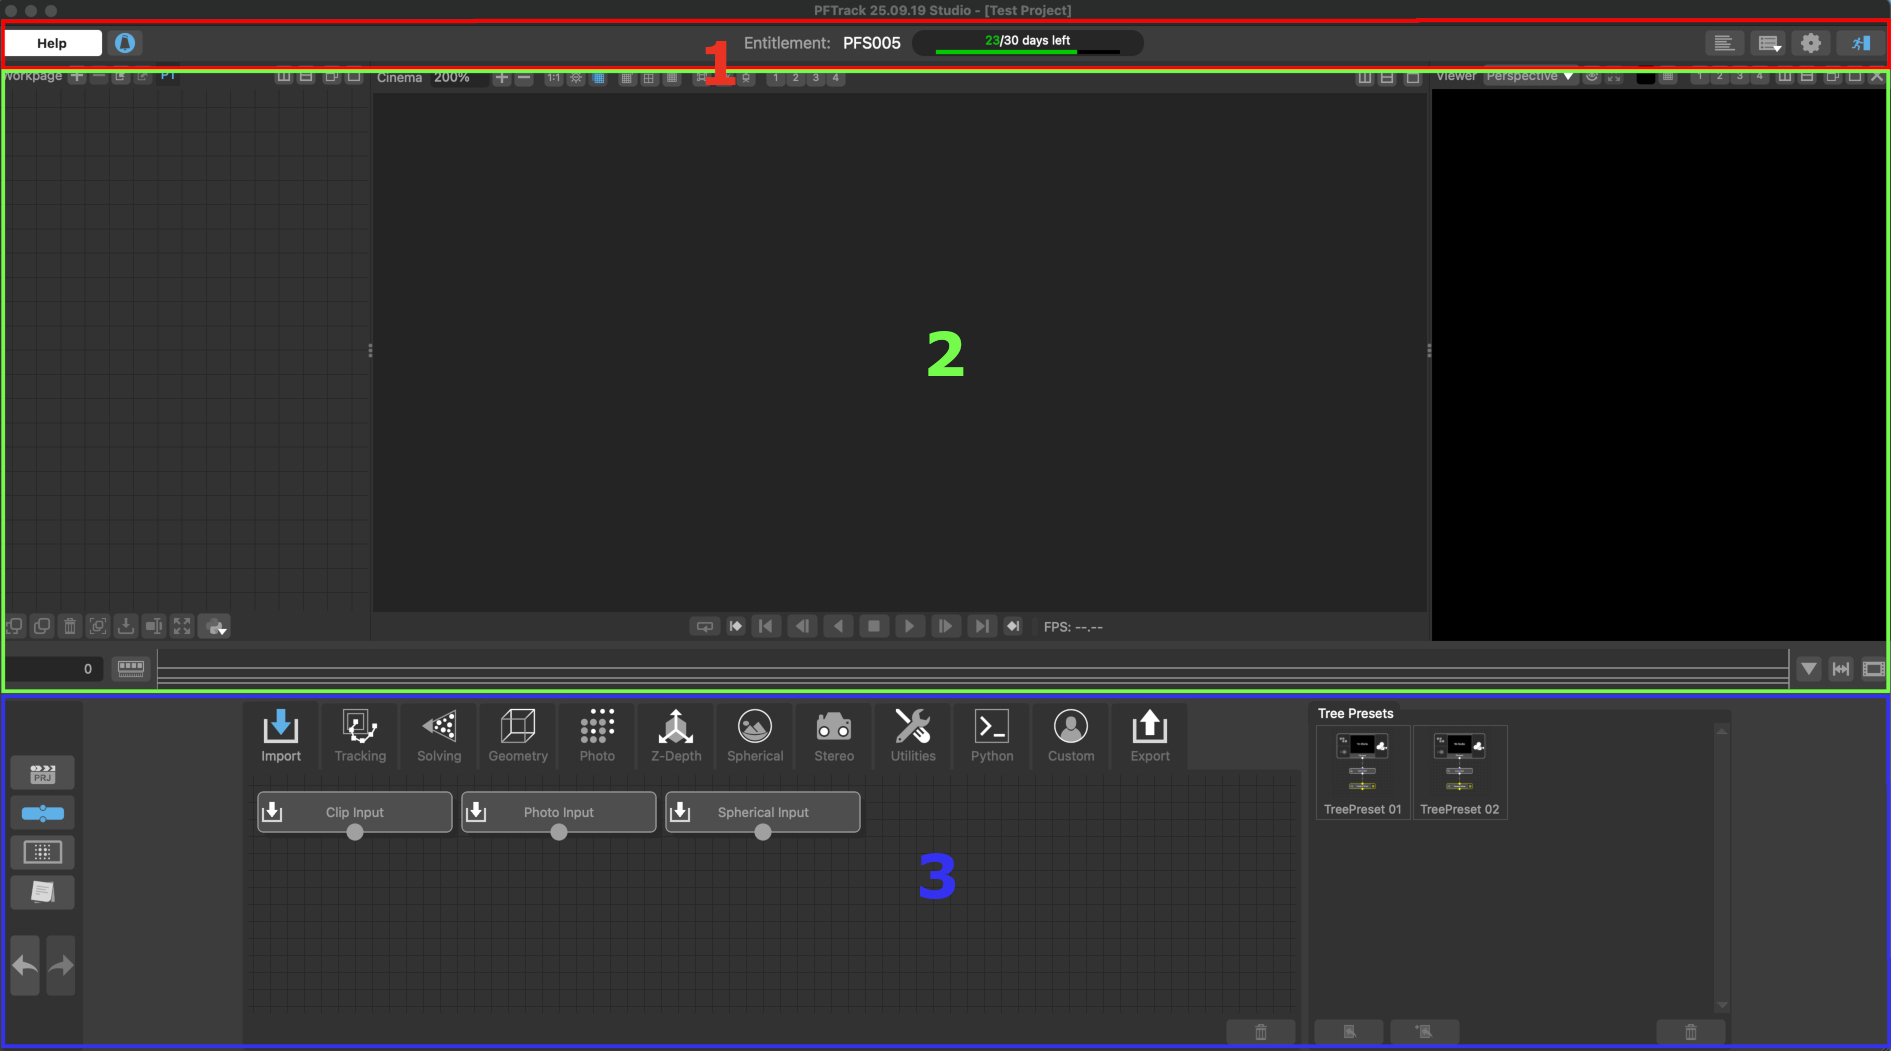
(1): The Toolbar.
(2): Upper workspace.
(3): Lower workspace.
Toolbar

At the top of the PFTrack user interface is the Toolbar:
(1): The Help menu, providing tools to search and browse the PFTrack documentation, and access support and the online community forum amongst other help and learning resources.
(2): The Notifications window, showing important news and messages from The Pixel Farm.
(3): Information about the account or entitlement being used.
(4): The number of days left before the current entitlement or trial expires.
(5): Additional buttons are also available to:
 Show/hide the log window
 Open/close the layout menu, allowing the PFTrack interface to be displayed full-screen or a pre-defined window and tool layout to be selected for use.
 Open the Preferences window, where many settings can be adjusted, and window layouts stored for later use.
 Exit PFTrack.
Note: The Enterprise edition will display additional information in the toolbar, such as the current project name, and the contents of the most recent line stored in the PFTrack Log file.
Upper workspace
The upper portion of the workspace contains a set of dynamic windows which can be adjusted and laid out as required.
In the default workspace layout, the windows which occupy this area are:
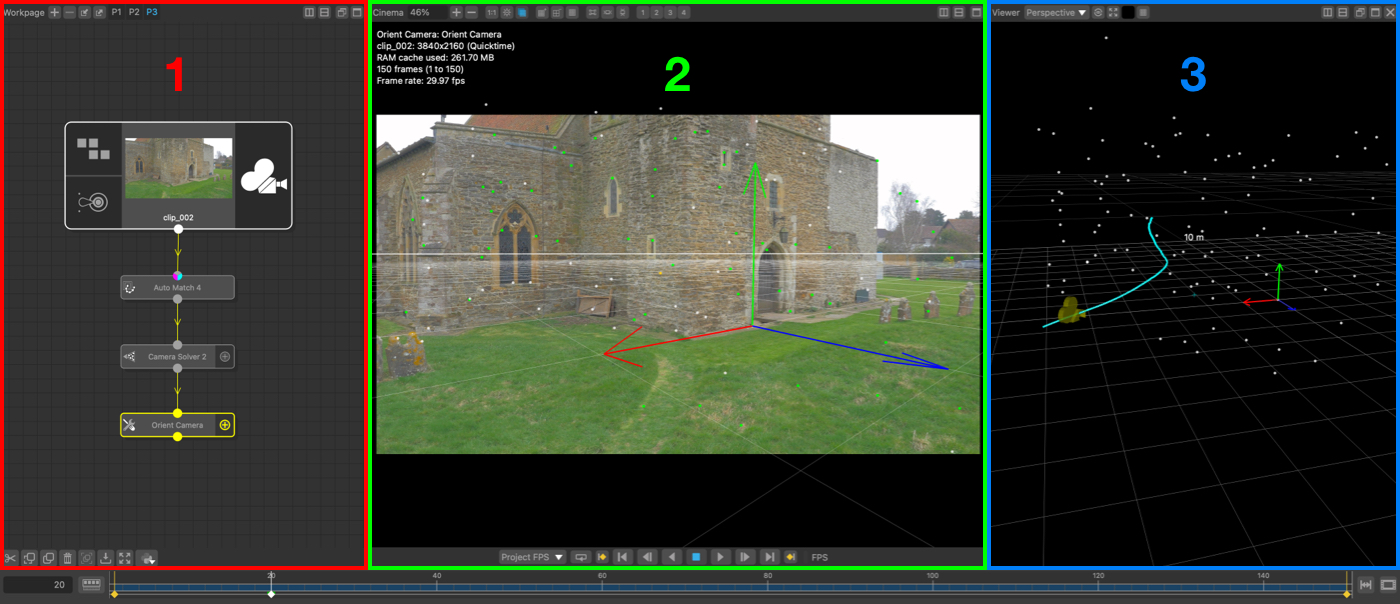
(1): The Workpage, which contains the node and tracking tree in the project.
(2): The Cinema Window which is used to display a through-the-camera-lens view of tracked shots, overlaid on top of media footage.
(3): One or more Viewer Windows which are used to display perspective or orthographic views of the 3D space.
(4): The Playback controls.
The Workpage and Cinema are always present in the workspace as they form an integral part of the PFTrack user interface. Multiple Viewer windows can be created and deleted as required.
Window control buttons
There are several buttons common to each window:
 : Clicking this button will pop a window out of the workspace to form a floating window (for example, to position on a second monitor).
 : Clicking this button will maximize the window to fill the entire upper workspace area.
 : Clicking either of these buttons will split the area occupied by the window horizontally or vertically into two, creating a new Viewer window.
Additional button that are specific to the Cinema or Viewer windows are described on those pages.
Floating windows
The position of each window can be changed by first popping the window out of the workspace by clicking the button. Once the window is floating on top of the PFTrack interface, click and drag the window's title bar with the left mouse button to change it's position. Releasing the left mouse button whilst hovering over part of the workspace will drop the window into the corresponding position.
Storing and recalling layouts
The layout of windows in the upper workspace can be stored in the project and even exported as XML files for use by others if required. The tools to do this are available in the User Preferences window.
Stored layouts can be quickly recalled using the drop-down workspace menu available at the top-right of the Toolbar.
Layouts can also have keyboard shortcuts assigned to them in the User Preferences window to make switching between them even easier.
Lower workspace
The lower portion of the workspace is fixed, and contains buttons to switch between various panels such as:
 : This button opens the Project Manager
 : This button opens the Node Panel.
 : This button opens the Camera Preset Manager Panel.
 : This button opens the Notes Panel.
 : Undo, redo any changes made to the tracking tree or nodes themselves. The number of undo and redo levels can be set in PFTrack's Preferences.