| PFTrack Documentation | Workspace |
Cinema Window
Mouse controls | Buttons | Keyboard controls
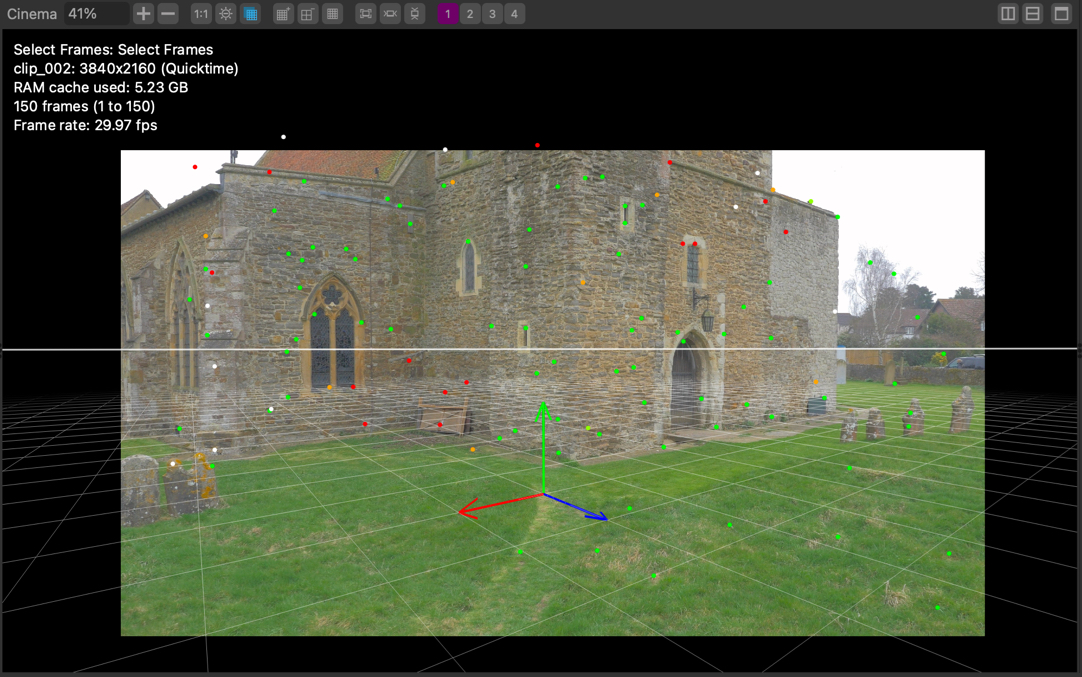
The Cinema Window displays a 'through-the-camera-lens' view of the media and any 2D or 3D data generated during the tracking process.
When a node is activated in the Workpage, it will automatically display its media in the Cinema window. If multiple inputs are connected to the node, each containing a different clip, controls in the node editor can be used to change which media is displayed. Further details are given the Node Reference documentation where appropriate.
When viewing a movie clip or image sequence, the Movie Playback are visible underneath the Cinema window. These contain a scrub bar and additional playback controls to play the movie or step through frame-by-frame.
When viewing a photo collection, the scrub bar is replaced by the Photo Navigation controls. This displays the photo thumbnails and can be used to navigate directly to a specific photo.
Mouse controls
- Click and drag with the right mouse button to pan the view.
- Click and drag with the middle mouse button to zoom the view.
- Mouse wheel can also be used to adjust zoom.
Buttons
At the top of the Cinema Window are additional controls that can be used to adjust the media display:
-  : Current zoom value (% of image size).
-  Increase or decrease the zoom to the closest multiple of 10 (if value is below 100) or 100 (if value greater than 100).
-  Toggle display of the clip with a 1:1 pixel aspect ratio.
-  Darken the clip image in the Cinema window. The brightness reduction factor can be changed in the preferences window using the Cinema Darken Factor parameter.
-  Toggle display of masks in the Cinema window.
-  Increase the ground-plane size displayed in the Cinema window.
-  Decrease the ground-plane size displayed in the Cinema window.
-  Open a colour selection window to change the colour and transparency of the ground-plane in the Cinema window.
-  Display the clip at its natural size, i.e. a zoom of 100%.
-  Zoom the clip so that it fills the width of the Cinema window.
-  Zoom the clip so that it fills the height of the Cinema window.
- Banks to store user-defined zoom and pan settings. Click and hold will store current window settings on bank 1 to 4. The button is blue if it holds stored settings. Click again to recall stored the settings.
Keyboard controls
Alt/Option+R Display the red image channel.
Alt/Option+G Display the green image channel.
Alt/Option+B Display the blue image channel.
Alt/Option+A Display the alpha image channel.