| PFTrack Documentation | Camera Presets |
Photo Camera Presets
Calibration Manager | Calibration Patterns | Loading Photos | Active Metadata | Camera Preset | Calibration | Preset ManagerThe Photo Camera Presets panel is composed of four main areas:
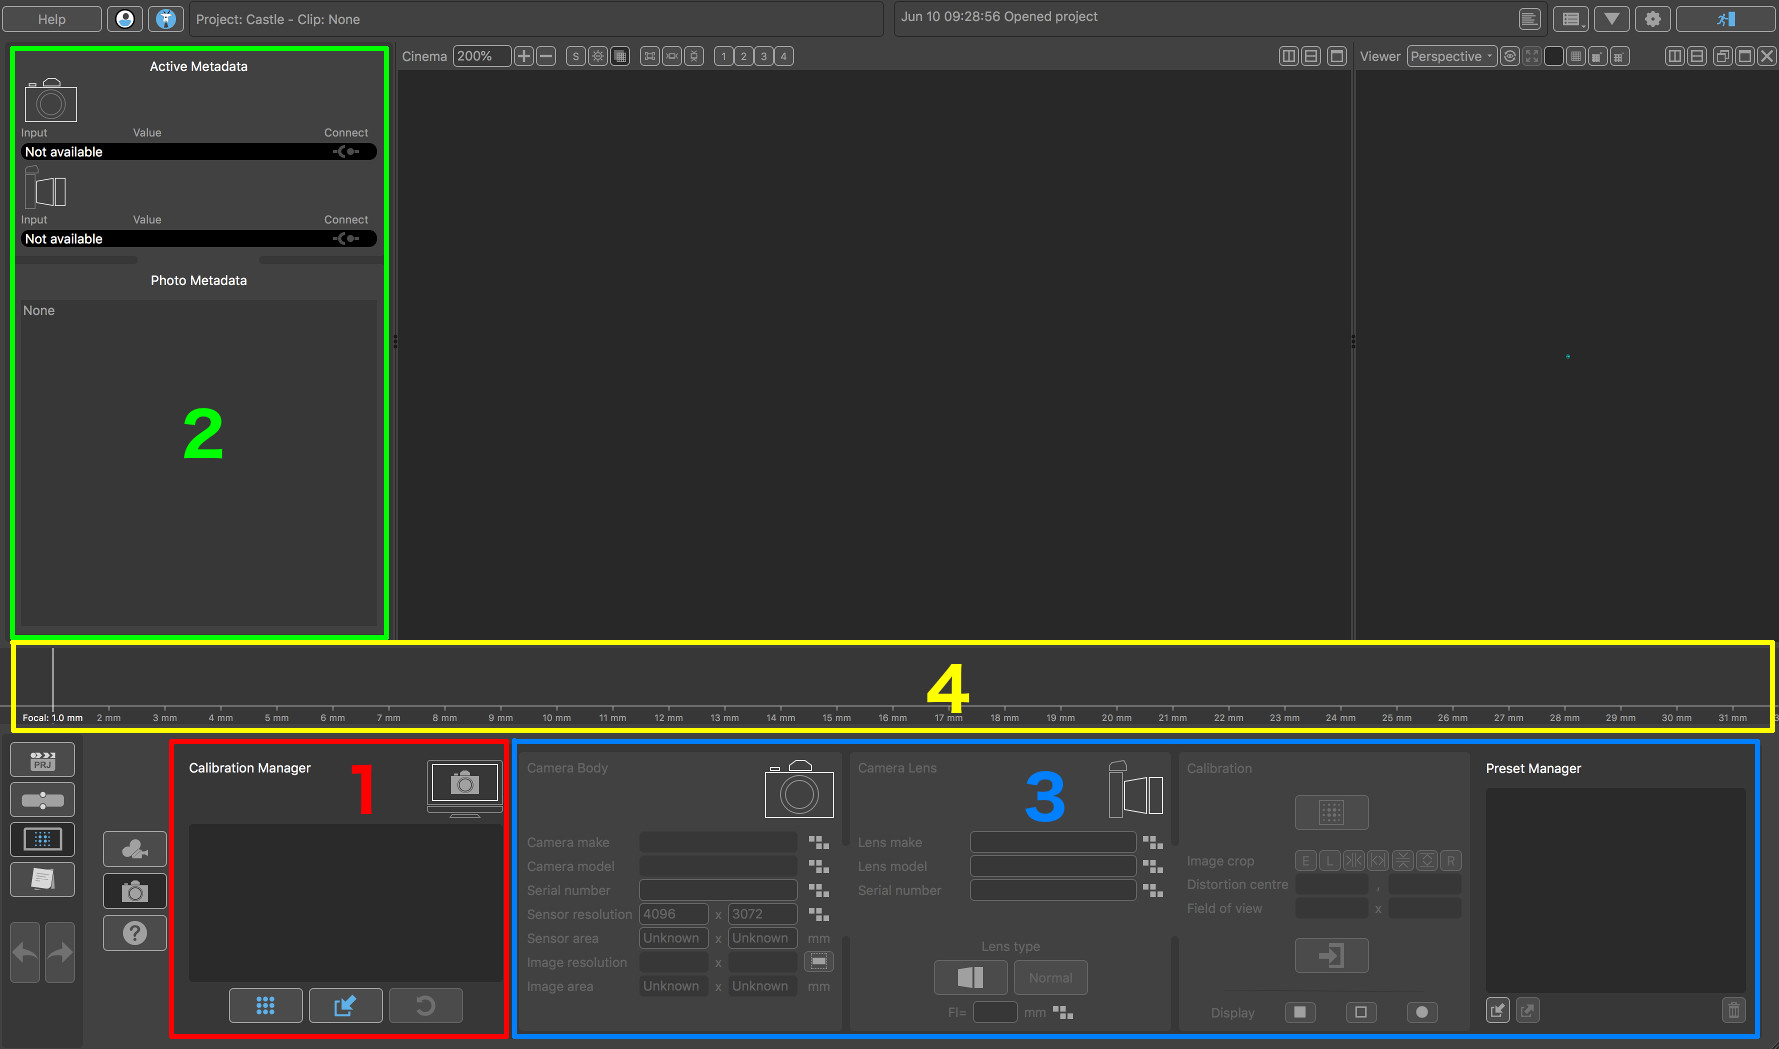
- The Calibration Manager (1), where photos can be loaded ready for calibration
- The Active Metadata Window (2), where photo metadata is displayed, and can be connected to the virtual camera for use during calibration.
- The Camera Preset parameters (3), where camera body and lens parameters can be adjusted if required, and where the camera preset is built
- The Focal Range graph (4), where calibration patterns for individual focal lengths are displayed.
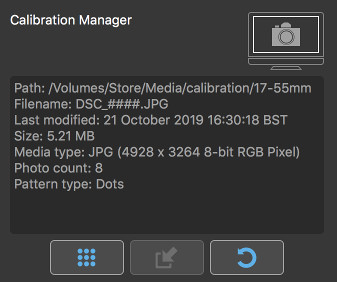
Calibration Manager
The Calibration Manager displays information about the photos that are loaded for calibration:
The following buttons are also available:
 - Clicking this button will display the File Browser where photos can be loaded.
 - Clicking this button will display a calibration pattern which can be photographed directly on the desktop.
 - Clicking this button will remove any photos loaded and reset the panel to its default state.
Calibration Patterns
PFTrack supports both checkerboard and a regular grid of calibration dots (black dots against a white background). Either pattern can be used for calibration, although if a choice is possible we recommend the new calibration dots pattern as it is often able to provide more accurate detection and calibration results.
The dots pattern can be displayed full screen directly from within the PFTrack UI (for example, to project onto a screen for image capture). To do this, click the button.
This will display a popup window showing the keyboard controls:
- + increase the pattern size,
- - decrease the pattern size,
- Esc Close the window.
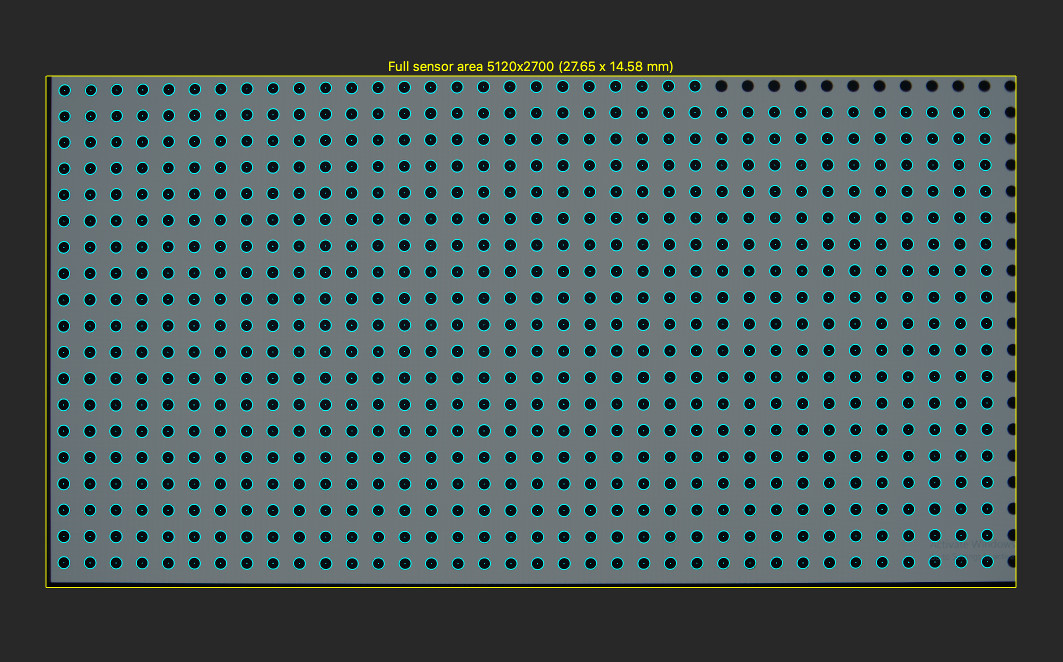
Clicking the OK button will display the calibration pattern full-screen. To ensure a large enough number of calibration points are detected, the grids should be shot front-on, filling as much of the image area as possible:
When calibrating zoom lenses, it is recommended to shoot calibration patterns at different focal lengths over the entire focal range of the lens. For example, a 50-150mm lens could be sampled with one calibration pattern every 10mm. For focal lengths between these samples, the lens distortion model will be interpolated. Lenses with a significant change in distortion over their focal range may require more calibration patterns to be shot.
Loading Photos
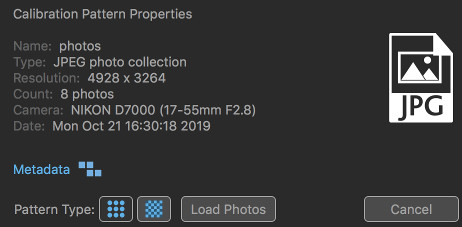
When loading photos from the native OS file browser, PFTrack will attempt to automatically determine whether the calibration dots or checkerboard pattern is present in the image.
If the embedded file browser is used instead, an additional option is available where the type of calibration pattern can be selected:
 .
.
The pattern type can be changed between:
 - A regular grid of calibration dots
 - A uniform checkerboard pattern.
Note: PFTrack will only import photos with appropriate EXIF metadata describing the camera focal length.
When photos are loaded, PFTrack will read the focal length of each photo from metadata, and automatically attempt to detect a calibration pattern in each image. Information about how successful this is will be printed to the log window:
Detecting calibration dots pattern in 8 photos..
Detected 958 calibration points in '/Volumes/Store/Media/calibration/17-55mm/DSC_7825.JPG'
Detected 858 calibration points in '/Volumes/Store/Media/calibration/17-55mm/DSC_7825.JPG'
Detected 648 calibration points in '/Volumes/Store/Media/calibration/17-55mm/DSC_7825.JPG'
Detected 876 calibration points in '/Volumes/Store/Media/calibration/17-55mm/DSC_7825.JPG'
Detected 928 calibration points in '/Volumes/Store/Media/calibration/17-55mm/DSC_7825.JPG'
Detected 658 calibration points in '/Volumes/Store/Media/calibration/17-55mm/DSC_7825.JPG'
Detected 773 calibration points in '/Volumes/Store/Media/calibration/17-55mm/DSC_7825.JPG'
Detected 1032 calibration points in '/Volumes/Store/Media/calibration/17-55mm/DSC_7825.JPG'
The Focal Range Graph will display the focal length for each calibration pattern that has been detected:

Clicking on a focal length value will display that photo in the Cinema window. If more than one photo has been captured at a single focal length, thumbnails will be available in the bottom-left of the Cinema window where each can be selected for display.
Active Metadata
After loading photos, the Active Metadata window will display any metadata available to use in the top-left of the PFTrack window:
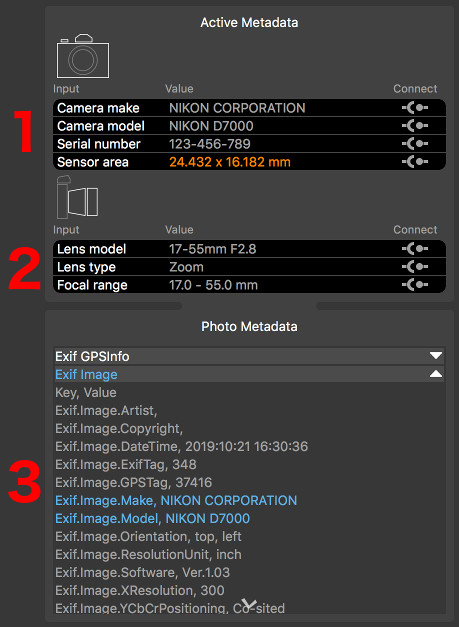
Information related to the Camera Body is shown at the top (1), and Camera Lens in the middle (2). The full list of all metadata in the media is shown in the Raw Metadata section (3).
The important values that PFTrack has identified are highlighted in blue. Individual sections of the Photo Metadata list can be opened and closed using the white arrow buttons to the right of each section title.
If PFTrack is not recognising the metadata from your media, you can update the metatags configuration file to tell it which metadata tags are important and what their function is. Further details are available in the section on Customizing PFTrack.
Connecting Metadata
If metadata is available to use, it must be connected to PFTrack's virtual camera in order to populate the camera preset data. This is achieved by clicking the Connect toggles next to each piece of metadata:
 : When in this state, metadata is not connected and is not being used (this is the default state).
 : This state indicates the metadata value is to be used as a Hint (for example, to find the best matching camera model containing sensor size information).
 : This state indicated the metadata value is to be used exactly as presented.
Not all states are available for each parameter input.
Camera Preset
Each camera preset contains information describing both the camera body and lens. These are separated out into two section of the panel:
Camera Body
The camera body parameters can be set to define the sensor size for your camera:
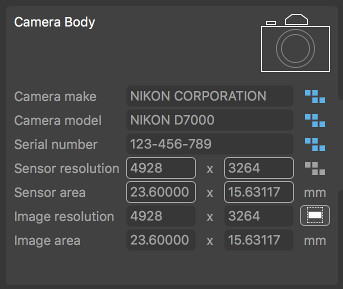
If metadata is available for the sensor area, it can be connected to the virtual camera in the Active Metadata window. If no sensor information is available, it can be entered manually.
Note: it is important that the sensor area is set correctly as it will influence the field of view of your camera.
Camera Lens
The Camera Lens panel contains parameters for your lens, including the lens make, model, serial number and squeeze factor if relevant:
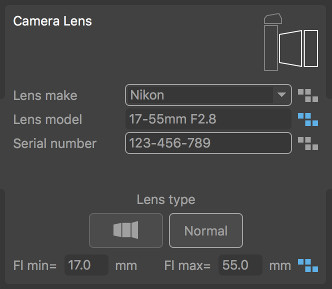
The Lens Type can also be selected using the following buttons:
 : When the prime lens button is active, the preset will be for a prime lens, calibrating lens distortion a single focal length.
 : When the soom lens button is active, preset will be for a zoom lens, where lens distortion is be calibrated at multiple focal lengths.
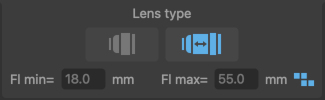
When using a zoom lens, the focal range over which lens distortion can be calibrated is specified using the Fl min and Fl max values:
Calibration
The Calibration panel is where lens distortion can be calibrated, and a camera preset generated:
Calibration pattern will be detected automatically when loading photos, with one point at each checkerboard corner, or one point at each calibration dot. For prime lenses, detecting a single calibration pattern is enough to calibrate lens distortion. For zoom lenses, calibration patterns should be detected at different focal lengths over the entire focal range. The exact number required will depend on how much lens distortion changes over the focal range.
In order to calibrate lens distortion, the following conditions must also be satisfied:
1. The Sensor area in the Camera Body parameters has been set.
2. The Focal length value has been set for a prime lens, or the Focal range has been set for a zoom lens
Once calibration patters have been detected, the  button can be clicked to start the calibration process.

PFTrack uses a smart lens distortion model that is able to adapt to many different types of distortion patterns, including spherical and wide angle lenses typically used for photogrammetry.
The calibration pattern points displayed in the Cinema window will be coloured to indicate the accuracy of the calibration, from red to yellow and green, and will undistort the source media using the calibrated lens distortion model.
Zoom lenses
Once a zoom lens is calibrated, clicking and dragging with the left mouse button in the Focal Range Graph will display the field of view of the camera at the current focal length:

Display options
The buttons at the bottom of the Calibration panel can be used to switch various display options on or off:
 - The sensor overlay button will toggle display of the sensor overlay information.
 - The calibration points button will toggle display of the calibration points.
 - The undistorted grid button will toggle display of the undistorted grid image.
 - This grid lines button will toggle display of the detected grid lines.
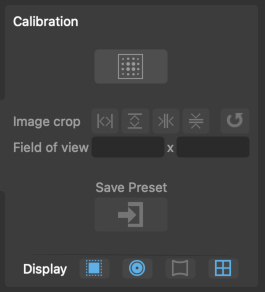
Adjusting image size
After lens distortion has been calibrated, controls are available to adjust image cropping if required:
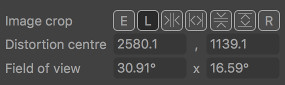
By default, a photo will undistort to the same resolution as the original image. This means some pixels will be lost around the boundary of the image. Adjusting the image crop size will allow these pixels to be recovered if desired.
-  : This Fit Outer button will fit to the full horizontal extents of the undistorted image.
-  : This Fit Outer button will fit to the full vertical extents of the undistorted image.
-  : This Fit Inner button will fit horizontally to ensure no empty pixels are visible at the left and right-hand edges of the image.
-  : This Fit Inner button will fit vertically to ensure no empty pixels are visible at the top and bottom edges of the image.
Storing Presets
Finally, once lens distortion has been calibrated, the preset can be stored in the Preset Manager panel by clicking the  button. This will display a popup window asking for a preset name. Clicking the Accept button will store the preset in the project.
Once presets have been stored, they become available for use in the Photo Input nodes.
Preset Manager
The Preset Manager panel lists all photo camera presets that are currently available in the project:
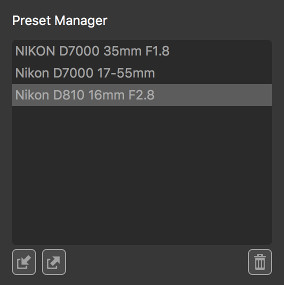
Individual presets can be selected for export by clicking with the left mouse button, and managed using the following buttons:
 : Clicking this button will export the preset as an XML file.
 : Clicking this button will import a preset XML file.
 : Clicking this button will remove the preset from the project.
When PFTrack launches, any preset files stored in the user's documents folder presets/camera (or an alternative location as specified in the Preferences window) will be automatically loaded into the project.