| PFTrack Documentation | Project Manager |
The Current Project
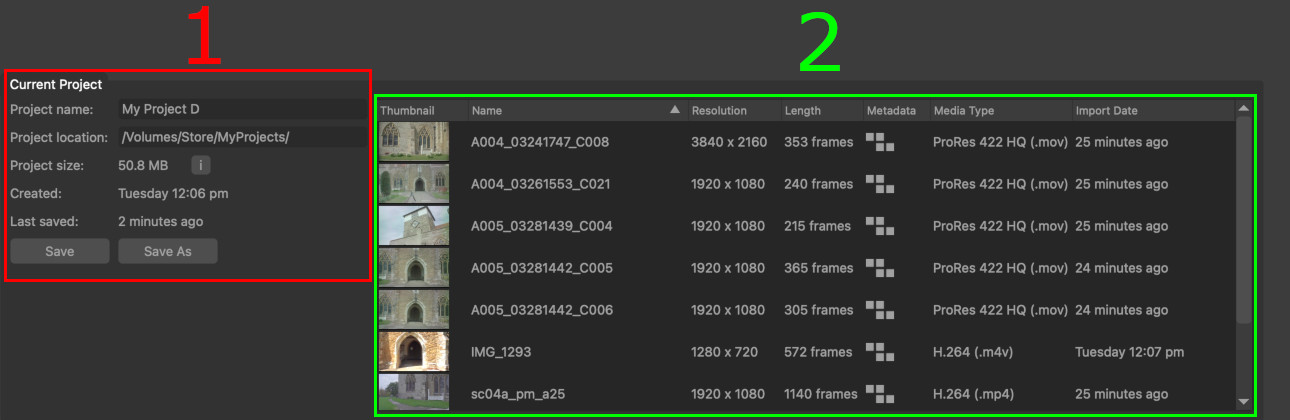
After opening a project, the project manager will display information about the current project (1) along with a list of media that has been loaded (2).
Project information
The project information panel (1) displays the name of the current project, and the location of the project folder, along with the amount of disk space used to store all the project data inside the folder.
To get a more detailed breakdown of disk storage, click the i button next to the project size to display a popup window containing information about which nodes are using the most space.
The project information also displays timestamps for when the project was created and when it was last saved.
Saving projects
PFTrack saves project data automatically. This is done every few minutes whilst using PFTrack, and also when exiting the application by clicking the Exit button at the top-right of the window to ensure no data is lost.
If you wish to save the project manually, click the Save button.
To save the project under a different name, or in a different folder, click the Save As button. This will display a popup window allowing you to choose a new name and/or location.
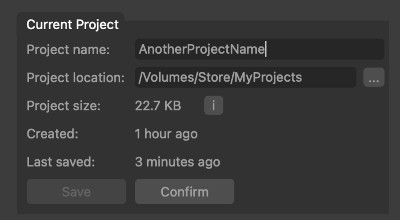
To open a file browser and choose a new project location, click the browse button (...).
Click the Confirm button to confirm the changes and the entire project folder will be saved at the new location.
Project media
All the media clips in the project (include movie clips, image sequences, photo collections, masks and st-maps) are displayed in the media list..
Items in this list can be sorted by clicking on the appropriate column header, and the order of columns can be changed by clicking and dragging on a column header with the left mouse button.

Each row in the table contains information about a single piece of media. Double-clicking with the left mouse button on a row will switch to the Workspace and display the Workpage where that media was first used. The Workpage will be centred on the input node containing the media.
Thumbnail: The media thumbnail.
Name: The media name. Hovering the mouse over this column will display a popup showing the complete file path for the clip.
Resolution: The media resolution.
Length: The media length (i.e. the number of frames in a clip, or the number of photos).
Metadata: This icon indicated whether metadata is available in the media. A blue icon is shown when metadata is available which can be used by PFTrack.
Media Type: The media type (for example, Quicktime, TIFF, etc..)
Import Date: The time and/or date when media was first imported into the project. Hovering the mouse over this column will show the full date and time of import.
Missing media
If any media cannot be read for any reason (for example, the drive on which it is stored is no longer mounted), the corresponding row of the media table will be coloured red, with a Media Missing icon displayed in place of the thumbnail.

Double-clicking on the row will take you straight to the input node where the media was loaded so you can re-link the missing files to their new location.